How to Make Scented Candles with Beeswax
- Why Choose Beeswax for Candles
- Materials Needed for Making Beeswax Candles
- Step-by-Step Guide to Making Scented Beeswax Candles
- How to Add Fragrance to Beeswax Candles
- Tips for Making Perfect Beeswax Candles
- Where to Buy Beeswax and Candle Making Supplies
Why Choose Beeswax for Candles
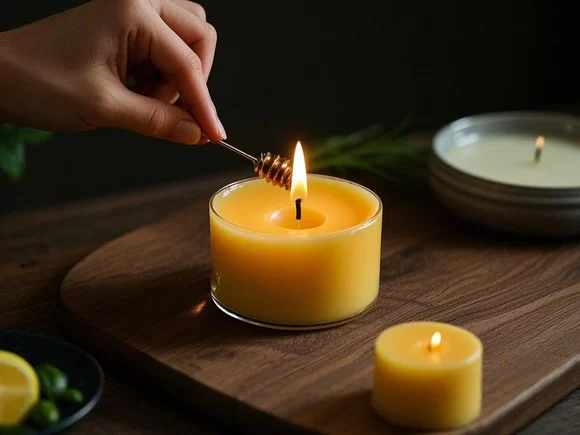
Beeswax is an excellent choice for making candles for several reasons. It is a natural, renewable resource, and when used in candles, it offers numerous benefits:
1. Natural and Eco-Friendly
Beeswax is a 100% natural product, unlike many other candle waxes that contain synthetic additives. It burns cleanly without emitting harmful toxins or soot, making it a healthier option for your home and the environment.
2. Longer Burn Time
Beeswax candles burn longer than traditional paraffin candles. This is because beeswax has a higher melting point, which means you can enjoy your candle for a longer period before it melts away.
3. Subtle, Natural Scent
Beeswax has its own mild, honey-like scent, which is perfect for those who prefer natural, subtle fragrances. When combined with essential oils, beeswax provides a balanced and pleasant aromatic experience.
Materials Needed for Making Beeswax Candles
Before you start making your own scented beeswax candles, gather the following materials:
1. Beeswax
Choose natural, unrefined beeswax pellets or blocks. Unrefined beeswax retains its natural scent and properties, making it ideal for candle making.
2. Essential Oils
Select your preferred essential oils for fragrance. Popular choices for candles include lavender, sandalwood, eucalyptus, or citrus scents.
3. Candle Wick
Use a cotton or wood wick, which is the best option for beeswax candles. Make sure the wick is the right size for the diameter of your candle container.
4. Double Boiler
A double boiler is essential for melting beeswax safely. It prevents direct heat from damaging the beeswax and ensures an even melt.
5. Candle Mold or Container
Choose a mold or container for your candles. You can use glass jars, tins, or silicone molds for unique shapes.
id="step-by-step-guide">Step-by-Step Guide to Making Scented Beeswax Candles
Follow this simple guide to create your own scented beeswax candles:
1. Melt the Beeswax
Start by setting up a double boiler. Place the beeswax into the top pot and allow it to melt slowly, stirring occasionally. Be careful not to overheat the wax.
2. Prepare the Wick
While the beeswax is melting, prepare your wick by securing it to the bottom of your candle container or mold. You can use a wick holder or simply attach the wick with a dab of hot wax.
3. Add Essential Oils
Once the beeswax has melted, remove it from the heat. Add your chosen essential oils to the wax. A general guideline is to use about 1 ounce of essential oil per pound of wax, but you can adjust this based on your desired strength of fragrance.
4. Pour the Wax
Carefully pour the melted beeswax into your container, making sure the wick stays centered. Leave a small gap at the top for the wax to solidify properly.
5. Allow to Cool
Let the candle cool completely, which may take several hours. Once fully cooled, trim the wick to about 1/4 inch above the surface of the candle.
How to Add Fragrance to Beeswax Candles
Adding fragrance to your beeswax candles is a simple process, but it’s important to follow a few guidelines to ensure a pleasant and lasting scent:
1. Choose High-Quality Essential Oils
For the best results, always use pure, high-quality essential oils. Synthetic fragrances can compromise the natural benefits of beeswax and may not burn as cleanly.
2. Add Fragrance at the Right Temperature
It’s crucial to add your essential oils once the beeswax has cooled slightly but is still liquid. Adding oils when the wax is too hot can cause the fragrance to evaporate too quickly, resulting in a faint scent.
3. Test Scent Strength
If you’re unsure how much essential oil to add, start with a small amount and test the scent strength. Remember, it’s easier to add more oil than it is to remove it!
Tips for Making Perfect Beeswax Candles
Here are a few tips to ensure your beeswax candles turn out perfect every time:
1. Use a Thermometer
Beeswax should be melted to a temperature of 145°F (63°C). A thermometer ensures that you don’t overheat the wax, which can affect the scent and burn quality.
2. Choose the Right Wick Size
Wick size is crucial for ensuring your candle burns evenly. A wick that’s too large can cause the candle to burn too quickly, while a wick that’s too small may result in a weak flame. Make sure to use a wick size appropriate for the container or mold you are using.
3. Allow Candles to Cure
Let your beeswax candles cure for at least 24 hours before lighting them. This allows the wax and fragrance to bind together and ensures a cleaner burn.
Where to Buy Beeswax and Candle Making Supplies
If you’re ready to try making your own scented beeswax candles, you can find all the supplies you need at Scent Snob. We offer a variety of high-quality beeswax, essential oils, and candle-making kits to help you create beautiful, natural candles right at home. Explore our collection and start your candle-making journey today!


0 comments